


View tabs
The service is included in the working libraries for Revit and is available when you install ModPlus without installing plugins.
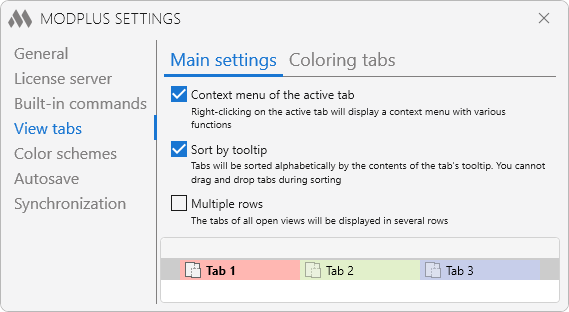
Main settings include the following options:
- Context menu of the active tab – allows you to invoke the context menu of the active Revit tab when you right-click.
The context menu is added to the active tab 0.5 seconds after it is opened or switched to.
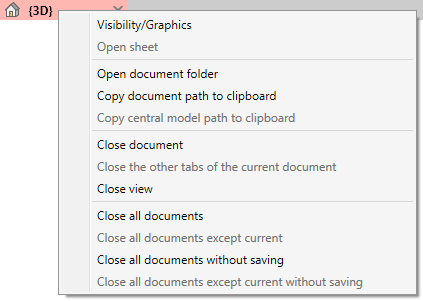
The context menu contains the following commands:
Visibility/Graphics – opens the Visibility/Graphics dialog for the view
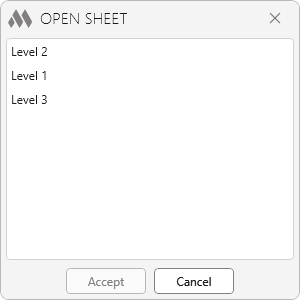
Open sheet – opens the sheet on which the view is placed. If the view is placed on several sheets, a window with a list of these sheets will open after selecting the command. In the window you can select one or more (with Shift or Ctrl key pressed) sheets that you want to open:
Open document folder – opens the folder where the current document is saved. The command is unavailable if the document is created and not saved
Copy document path to clipboard – copies the path to the document location on the disk to the clipboard.
Copy path to central model to clipboard – copies the path to the location of the central model to the clipboard. The command is active if the file is running in Collaboration
Close the other tabs of the current document – closes all tabs of the current document except the active one
Close document – closes all tabs of the current document
Close view – closes the current view
Close all documents – closes all tabs of all open documents. If there are unsaved changes in the documents, you will be prompted to save them
Close all documents except for current – closes all tabs of all open documents except for the tabs of the current document. If there are unsaved changes in the documents being closed, you will be offered to save them
Close all documents without saving – closes all tabs of all open documents without saving changes
Close all documents except current without saving – closes all tabs of all open documents except for the tabs of the current document without saving changes
- Sort by tooltip – enables sorting of tabs by the contents of the tooltip that appears when the cursor hovers over the tab. The value of the tooltip corresponds to the "Document name - View type: View name" template.
When sorting is enabled, it is impossible to manually change the position of tabs
- Multiple rows – if this option is enabled, the tabs of all open views will be displayed in several rows.
- Each document on a new row – the option is available when Sort by tooltip and Multiple rows are enabled. Moves a tab related to another document to a separate row regardless of available space in the current row.
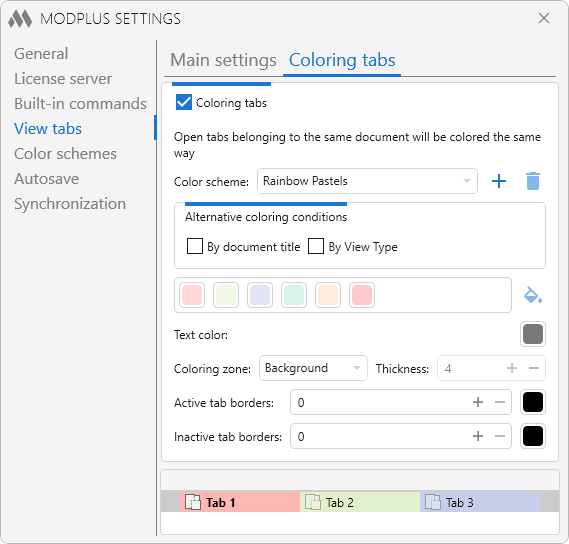
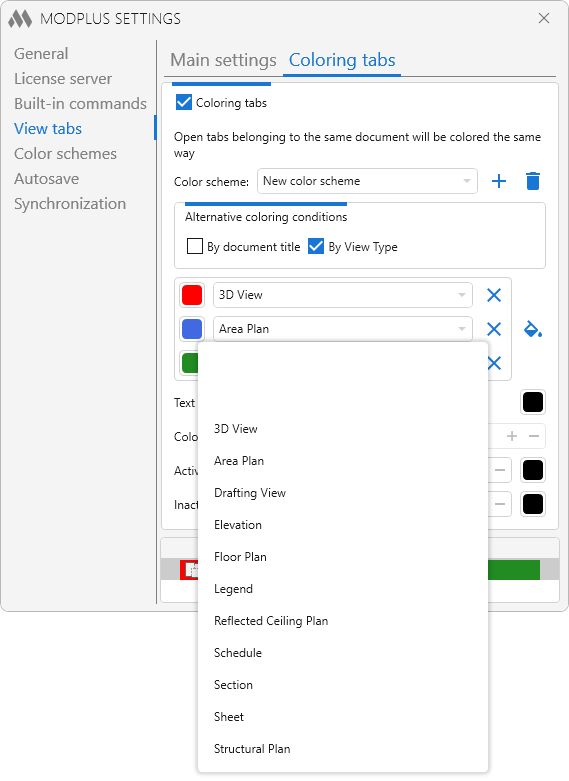
The service automatically colors tabs depending on their association with a specific document.
To start using the service, enable the Сoloring tabs option. The service allows separate settings for Project Tabs and Family Tabs.
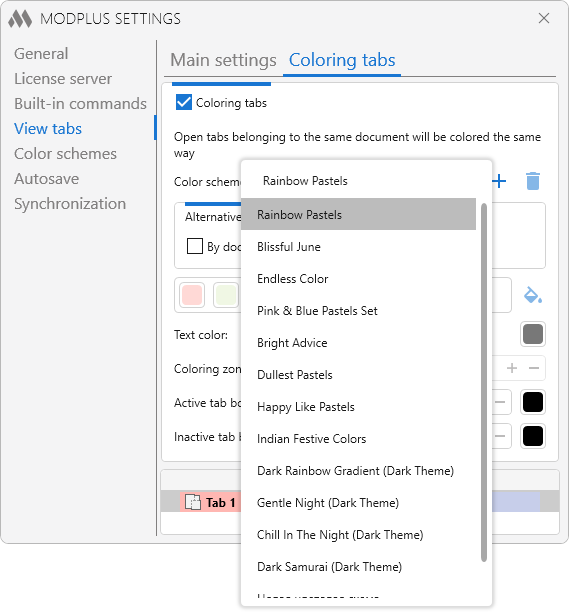
Coloring is applied according to the selected Color scheme.
Select a predefined color scheme using the drop-down list:
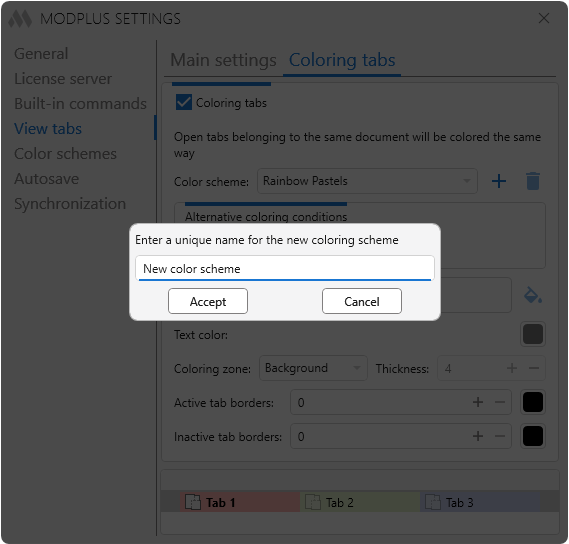
Or create a new tab coloring scheme by clicking on  , or delete an existing one on
  :
:
After that, create a new color scheme with the color addition tool  and color palette:
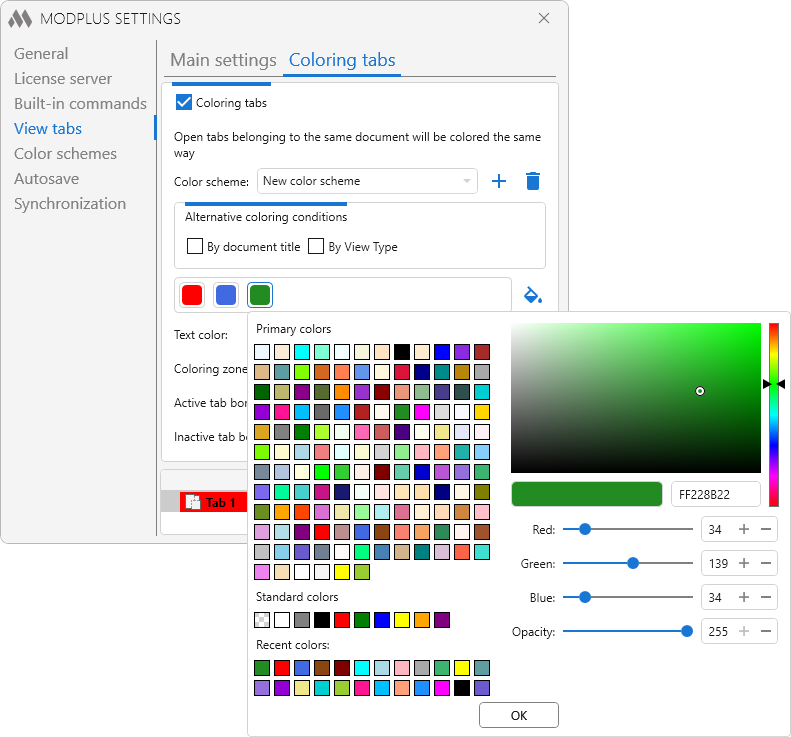
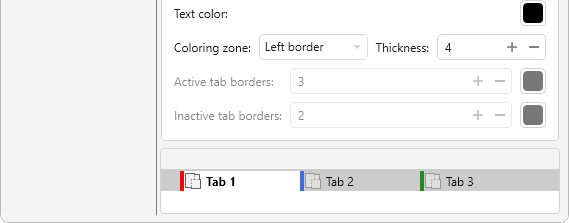
For each tab color, you can configure the text color.
If the number of open documents exceeds the number of colors in the color scheme, the additional documents will not be colored.
Additionally, you can define conditions that determine the color of the tabs:
By document title – the project or family tabs will be colored in the specified color if the document title contains a phrase written in the line:
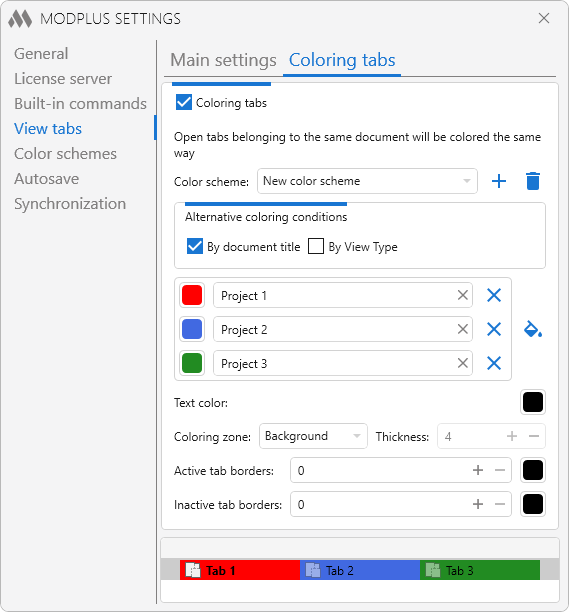
By View Type – the tabs will be colored by a certain view type, which can be selected from the drop-down list:
At the bottom of the service's dialog box are additional tools for customizing the coloring and layout of the tabs:
- Coloring zone – allows to select the coloring zone (Background, Left border, Bottom border, Top border, Right border, All borders).
For the Background value, choose the thickness and color of the border of the active and inactive tabs:

For the Left border, Bottom border, Top border, Right border, All borders values, select the thickness of the coloring border line:
- Resize the active tab – when this option is enabled, the height of the active tab will be increased relative to the other tabs.
- Opacity of inactive tabs – sets the transparency level of inactive tabs. The lower the value, the more faded the inactive tabs will appear compared to the active tab.