


Auto update module
The auto update module is one of the components of ModPlus that provides centralized management of all system elements. It is responsible for downloading, installing, and updating plugins and working libraries, allows manual installation of components, tracking version relevance, viewing change history, and managing installed ModPlus components.
The executable file for the module is mpAutoUpdater.exe, which is located in the ModPlus folder. When a supported product (AutoCAD, Revit, Renga, nanoCAD) is launched, the module starts automatically. The module runs in the system tray (Windows taskbar). Depending on the current state of the module, the tray icon is displayed in one of several variants:
 |
– the supported product is not running. There are no missed events |
 |
– the supported product is not running. A check and/or update process is in progress |
 |
– the supported product is running. There are no missed events |
 |
– the supported product is running. A check and/or update process is in progress |
 |
– no write access to the ModPlus folder |
| – updates have been downloaded and will be installed after closing the supported product. The icon displays a number from 1 to 9 indicating the number of unique updates. If there are more than 9 updates, the letter U is displayed on the icon |
Checking for updates is performed at the interval specified in the settings (see below), as well as one minute after the module is started.
Double-clicking the module icon with the left mouse button opens the module settings window. Right-clicking the icon opens the module context menu:
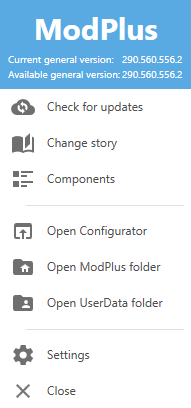
The header of the context menu displays the current and available General version of ModPlus.
The context menu contains the following items:
- Check for updates
- Change history
- Components
- Connections
- Plugins
- Menu
- Personal account
- Open ModPlus folder
- Open UserData folder
- Settings
- Close
CHECK FOR UPDATES
Forces an update check.
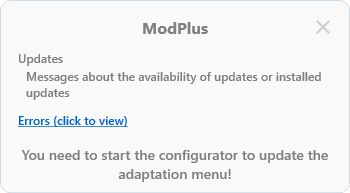
When checking for updates of ModPlus components and plugins, they are downloaded and installed (if the supported product is not running) or a notification about available updates appears (if the supported product is running). Notifications about available updates or installed updates (as well as errors during update attempts) are displayed in a dedicated window:
If new plugins are found during the update check (i.e., plugins not installed by the user), a window with a list of plugins appears, where they can be installed, or the Automatically install new plugins option can be enabled so that the process runs without prompting in the future.
When updating the auto update module itself, the update notification is displayed in the standard Windows notification window that appears in the lower-right corner of the screen. The current module version is displayed in the settings window (see below).
CHANGE HISTORY
This menu item opens the change history in a separate window:
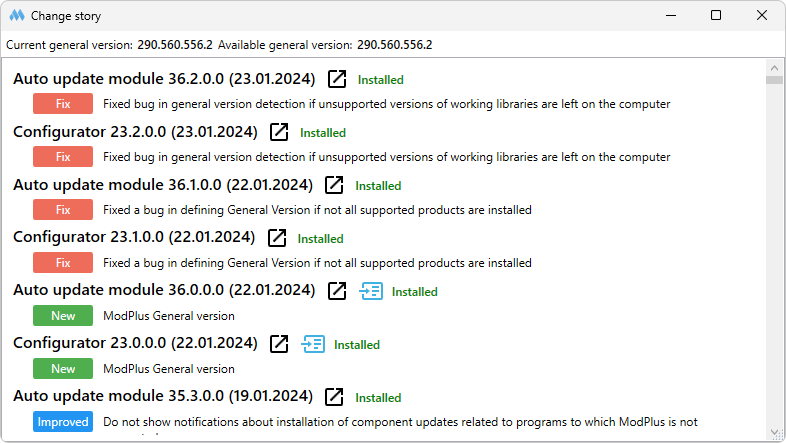
This window also displays the current and available General version of ModPlus.
COMPONENTS
This menu item opens the component version check service in a separate window:
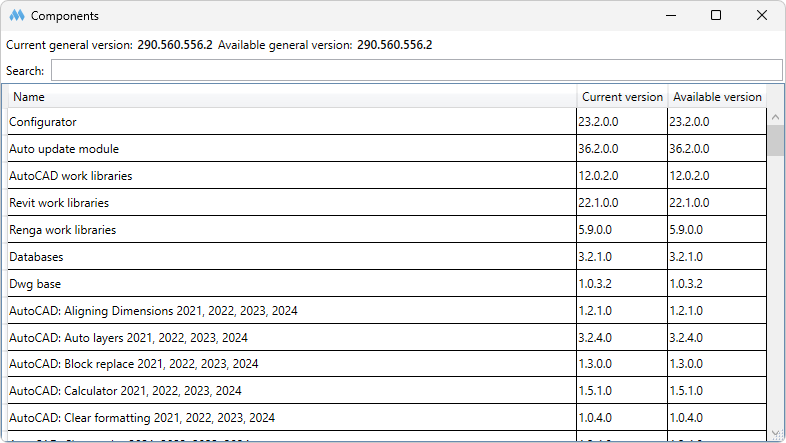
This window also displays the current and available General version of ModPlus.
CONNECTIONS
Opens the menu for managing ModPlus connections to supported products:

PLUGINS
This menu item opens the plugin management window:

The top part of the window contains controls for displaying the plugin list:
Product – select the product for which you want to display plugins. This list is populated based on the supported products installed on the user's computer.
Product version – select the version of the specified product. This list is populated based on the supported products installed on the user's computer.
Show paid – enable/disable display of paid plugins.
Show free – enable/disable display of free plugins.
Show uninstalled – enable/disable display of new plugins (i.e., not installed plugins).
To display all plugins, uncheck all boxes.
Install visible – starts installation of all currently visible plugins.
Enable visible – enables all currently visible plugins.
Disable visible – disables all currently visible plugins.
The following options are available to the right of the plugin name in the list:
 – this icon indicates that the plugin is paid
 – button to open the plugin page on the website
 – this button indicates that the plugin is either not installed or a new version is available. Clicking it will automatically download and install the plugin.
Basic plugin information is also displayed: current version, available version, plugin description, and the enable/disable button.
MENU
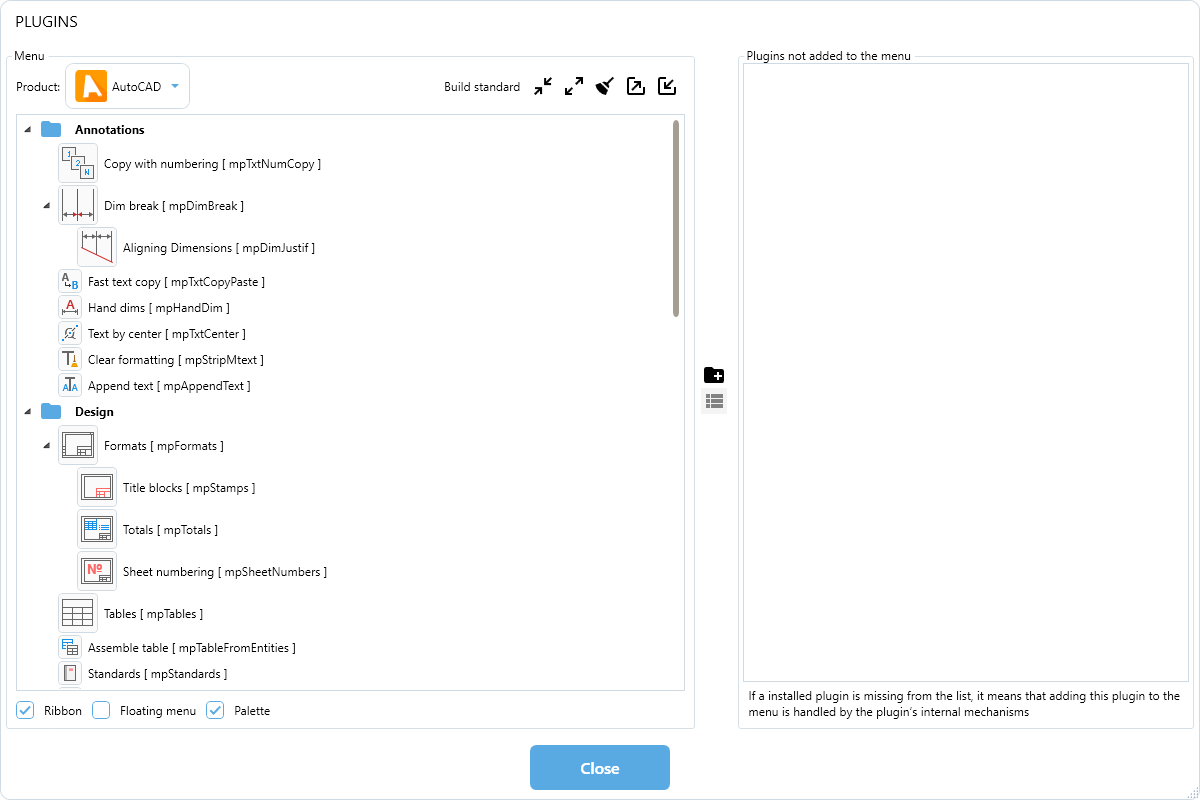
A tree view of your menu containing groups and plugins within groups. Plugins can be placed either inside a group or inside another plugin (displayed as a drop-down button on the ribbon). For Revit plugins, a special panel (2 or 3 plugins) can be added. Placing a group inside a panel allows the ribbon buttons to be displayed in a compact size.
Buttons for creating a new group  or panel
  are located to the right of the list. Plugins are arranged by dragging them with the mouse.
Build standard – when clicked, the menu will be built according to the standard scheme (an internet connection is required)
 – delete the current menu for the specified supported product
 – export the customized menu to an XML file
 – import the customized menu from an XML file.
Plugins not added to the menu – contains a list of plugins that can be added to the menu.
PERSONAL ACCOUNT
Opens the Personal Account with information about your account. The Personal Account contains general account information, license information, and functionality for managing settings backups.
OPEN MODPLUS FOLDER
Opens the folder where the ModPlus software is installed.
OPEN USERDATA FOLDER
Opens the folder where user data is stored.
SETTINGS
Auto update module
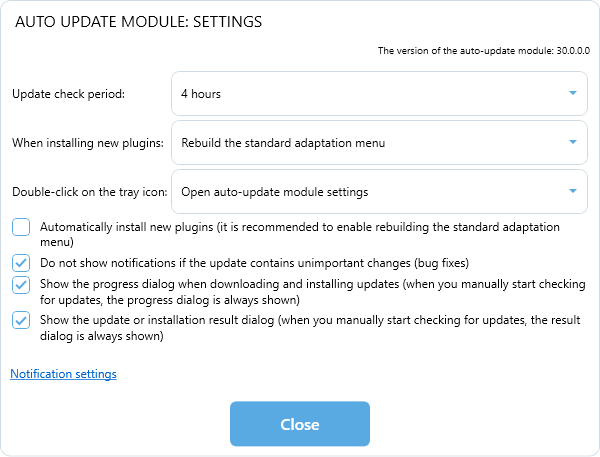
Update check period – sets the time interval (from the moment the module starts) after which updates are checked. Available values: 30 minutes, 1 hour, 2 hours, 4 hours, 8 hours.
When installing new plugins – defines the behavior when installing new plugins. Available options: Rebuild standard customization menu (similar to the Build standard button in the Menu window), Do not rebuild menu (in this case, you will need to open the Menu window and add new plugins manually).
Do not show notifications if the update contains unimportant changes (bug fixes) – if plugin or ModPlus component updates (except the auto-update module itself) contain minor changes (usually small bug fixes), the update will be performed without displaying progress or notification windows. If a supported product is running while minor updates are available, the update check will restart immediately after it is closed. If the update check is started from the context menu, or if errors occur during the update, the progress and notification windows will be displayed regardless of this setting.
General
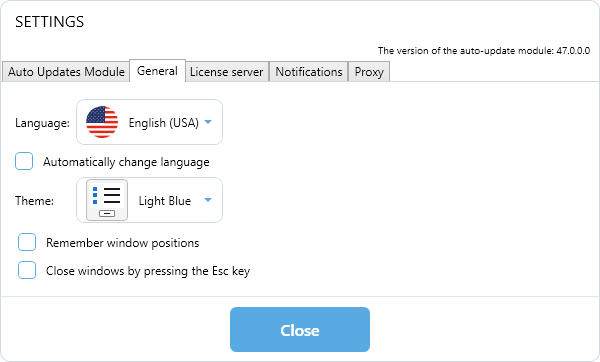
This section allows you to select the interface language and theme. The Automaticallychange language option allows automatic switching of the entire ModPlus software localization depending on the running version of the supported product. You can also enable saving plugin window positions and configure closing windows by pressing the Esc key using the corresponding options.
License server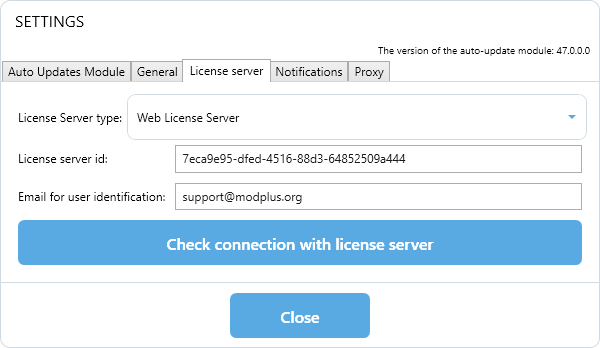
This section is used to select and configure the License Server. A detailed description of the settings is provided in the License server settings section of the ModPlus Settings help.
Notifications
This section allows you to select the categories of ModPlus news and updates that will be displayed. Important notifications are shown regardless of the selected settings.
Notification settings can also be opened in the settings window in AutoCAD/Revit/Renga/nanoCAD.
Proxy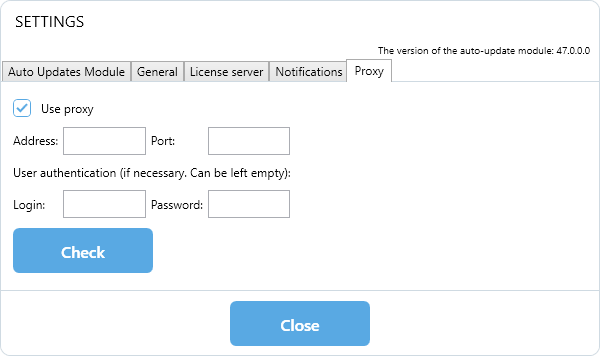
This section allows you to configure proxy connection parameters. When the corresponding option is enabled, the proxy address and port are specified, and if necessary, user authentication data (login and password). The Check button allows you to verify the correctness of the specified parameters and the availability of the connection.
CLOSE
Closes the auto update module.