Icon
Related news and articles
Using
The plugin window contains configuration controls and several general settings for the plugin operation:

In the upper part of the window there is a drop-down list of all created working configurations. The configuration selected in the list is current when the plugin is running. The following commands are available to the right of the list:
 – opens a window for creating a new configuration (described below).
 – opens a window for editing the currently selected configuration. The editing window is similar to the configuration creation window (described below).
 – permanently deletes the selected configuration.
Work Cycle – if the checkbox is checked, the plugin will repeat the request for points to create dimensions until canceled by pressing Esc. If the checkbox is unchecked, then the plugin will ask for two points only once
Object snap when specifying point – option that allows to disable object snap when specifying point
Specify the location of the dimension line – if the checkbox is checked, then after requesting two points of the conditional cutting line, there will be an additional request for specifying the point of placement of the dimension line of the created dimension
Process linked files – if the checkbox checked, elements from linked files will be taken into account when dimensioning. In this case, keep in mind that absolutely all elements of the linked file will be analyzed and dimensions can be set even for those elements that are not visible in the view.
Line preview on Plan – this option enables previewing line along which the dimension should be created
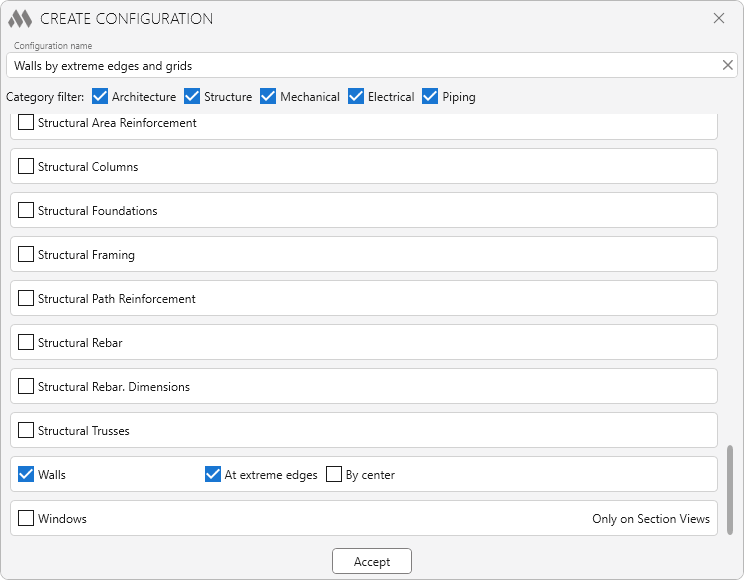
In the upper part of the window there is a field for specifying the name of the configuration. This name will be displayed in the configuration selection list in the previous window.
Category filter –allows you to display only the categories of the checked sections in the list.
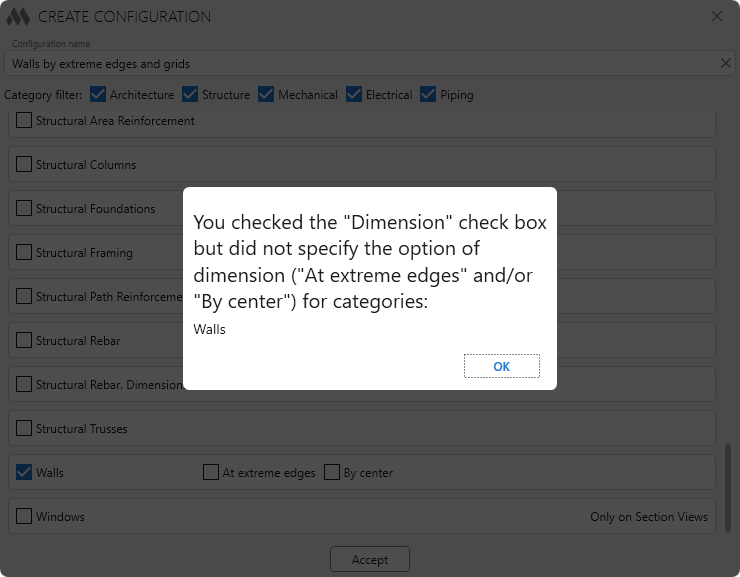
Below is the list of categories that are processed by the plugin. Those categories that require dimensions in the current configuration should be checked with checkboxes. For some categories, checking this checkbox may open the specification of how to set the dimensions - by extreme edges and/or along the axis. In this case it is necessary to check at least one additional checkbox!
Accept – closes this window with saving all configuration settings. If the "Dimension" checkbox is checked, but neither of the two checkboxes "At extreme edges" or "By center" is checked, a warning window will appear after clicking Accept:
After running the plugin with the current configuration, requests for specifying points will be made:
Enter first point – picks the first point of the conditional line.
Enter second point – picks the second point of the conditional line.
The dimension is constructed by drawing a line perpendicular to the first element intersected by the cutting line, opposite the first point.
If the request for the dimension line placement point is enabled, the dimensioning principle is preserved, but the dimension line is placed at the specified point.


