Splitting of straight rebars by length with different connection options
Icon
Related news and articles
Using
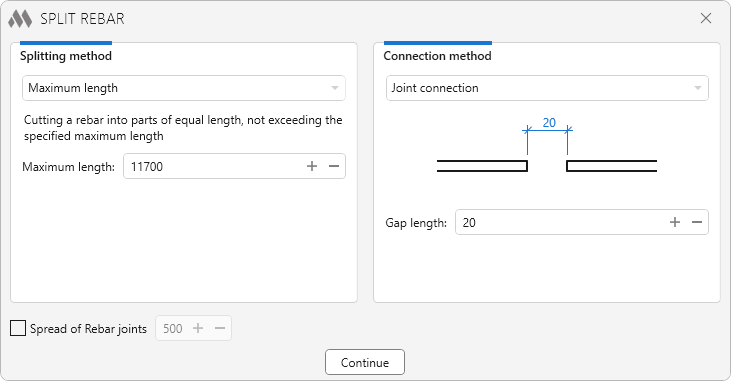
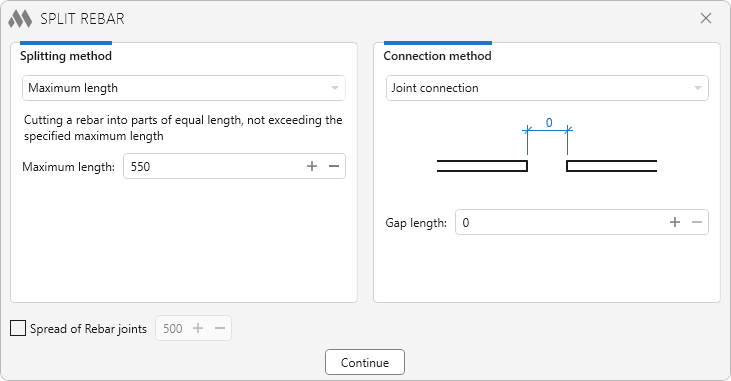
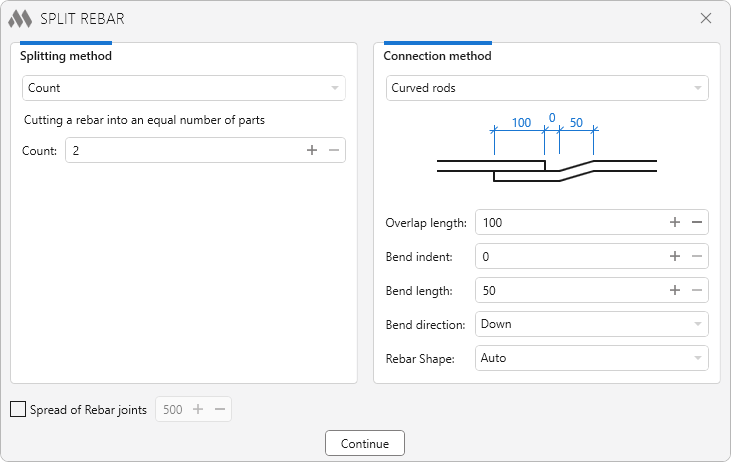
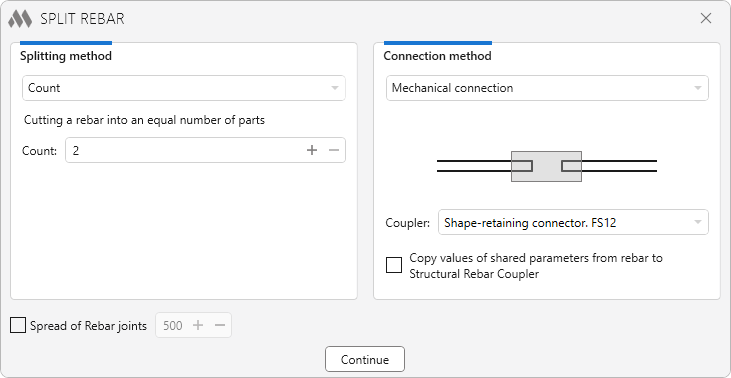
The dialog window specifies the method of rebar splitting (left) and the method of processing the connections of the split rebar (right). A detailed description of these methods can be found later in the help.
When you click Continue, a pop-up dialog appears that contains the following ways of selecting the rebar:
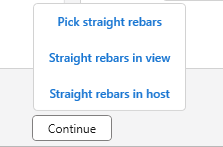
- Pick straight rebars — allows to select the rebars to be split manually.
- Straight rebars in view — allows to select all rebars that are displayed in the view.
- Straight rebars in host — allows to select a host and the plugin will select all straight rebars that are contained in that host.
When splitting a rebar, the plugin will take into account the splitting method and connection method settings at the same time.
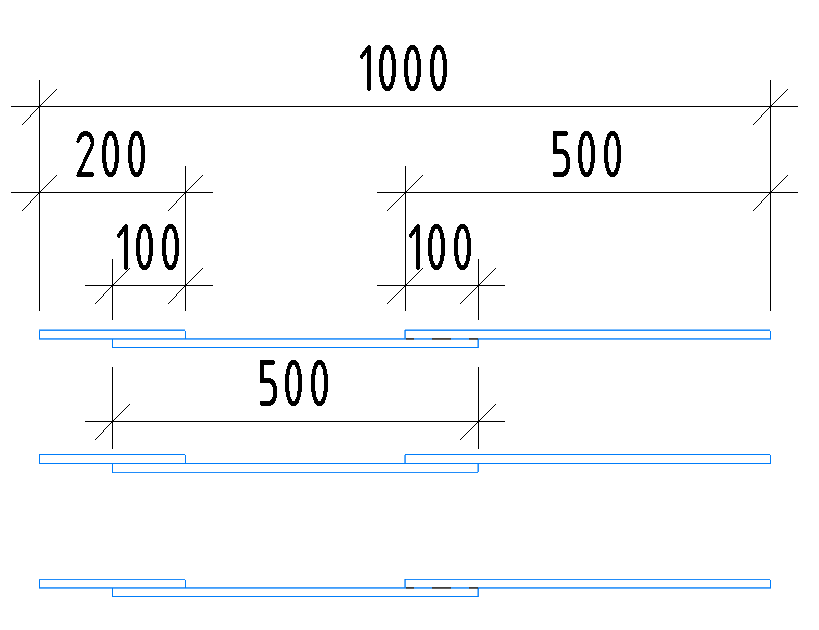
For example, if split a bar with a length of 1000 to the exact length of 500 mm and include an overlap of 100 mm, the plugin will keep the specified length of the bars after splitting.
So get two bars 500 mm long and one additional bar 200 mm long, so that the outermost size of the set of bars is 1000 mm. And the overlap of all bars will be 100 mm.
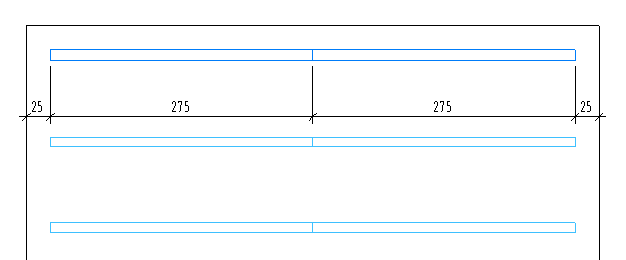
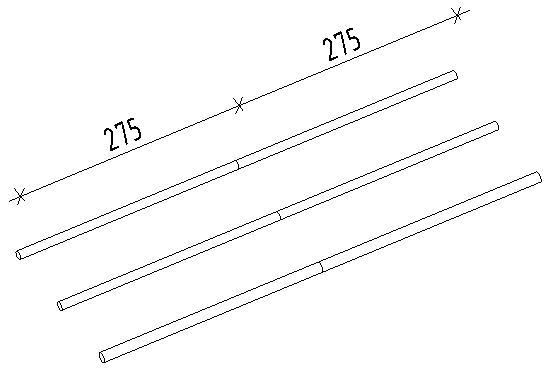
Before rebar splitting:
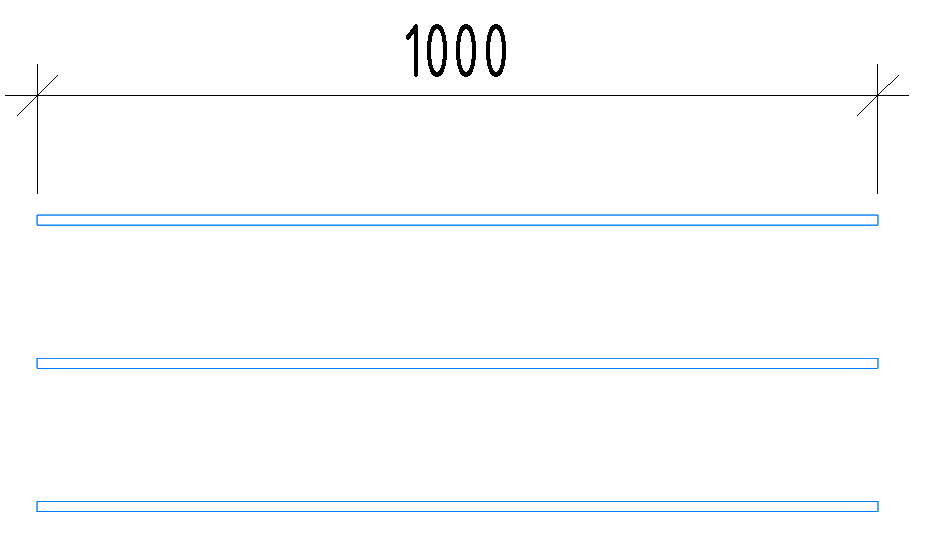
After rebar splitting:
Regardless of splitting method and connection method, the option Spread of Rebar joints is available at the bottom of the plugin window. When this option is enabled, every second rod will be shifted to the start by the specified spacing (from 100 to 2000 mm) and two rebars will be produced instead of one.
Without spread of rebar joints:
With spread of rebar joints:
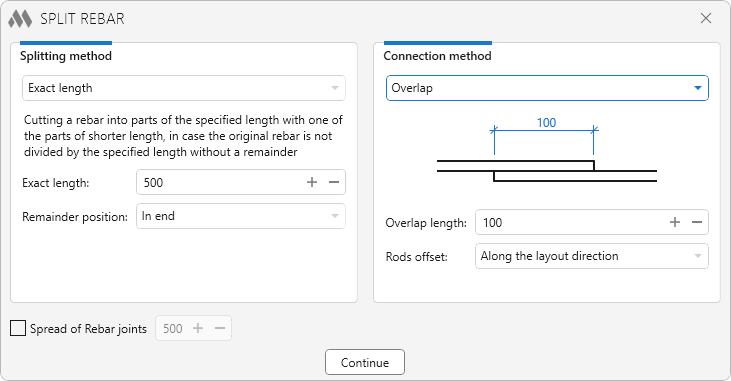
Splitting method
Sets the method of splitting rebars into several pieces. The break length depends on the selected method:
- Maximum length
- Count
- Exact length
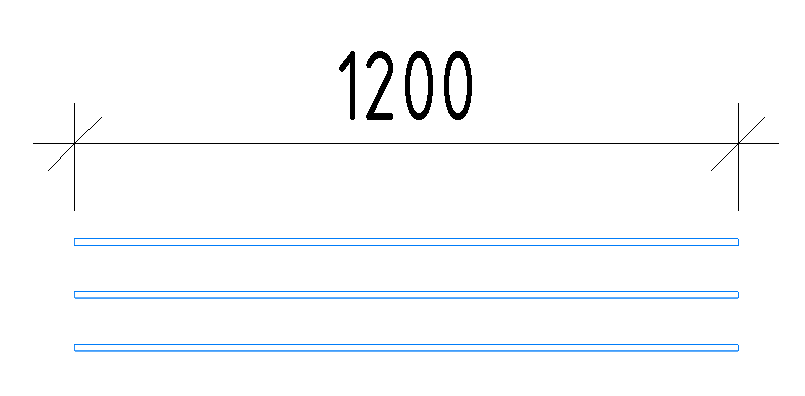
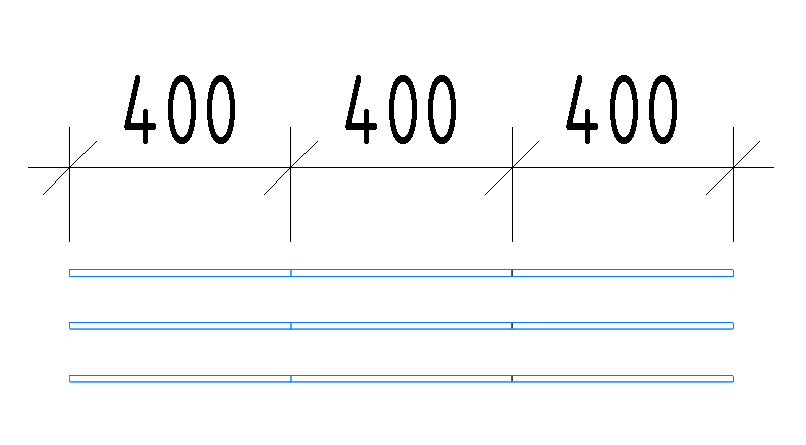
Method Maximum length splits rebars into parts of equal length, not exceeding the specified maximum length.
Before rebar splitting:
After rebar splitting:
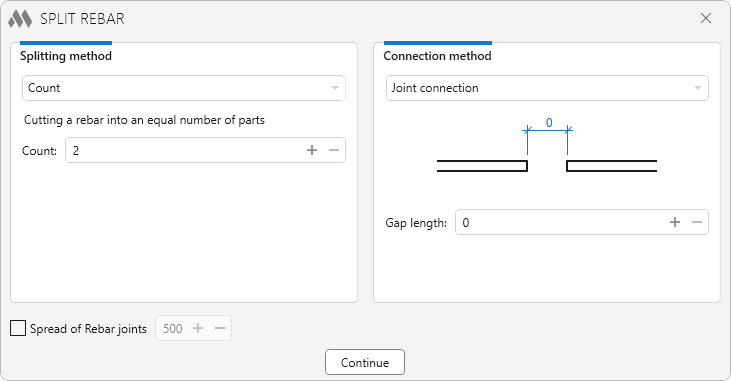
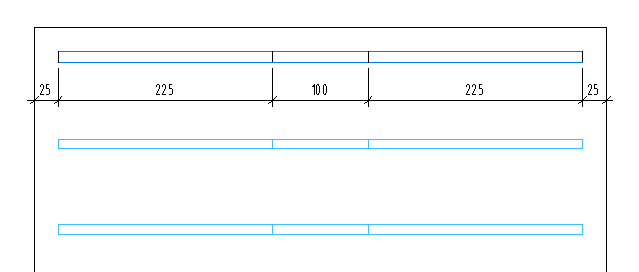
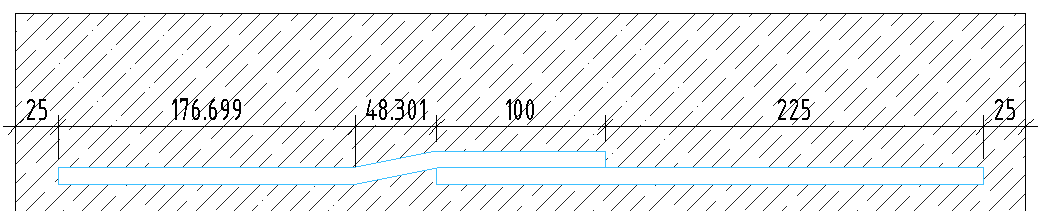
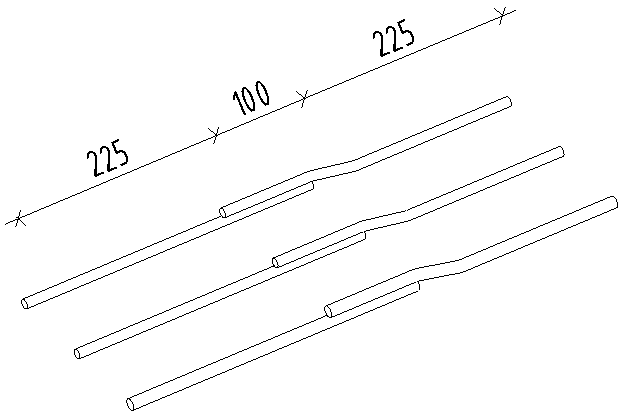
Method Count splits the rebar into an equal number of pieces.
Method Exact length allows to split a rebar into pieces of a specified length.
If the size of the rebar is not a multiple of the split length, then the remainder can be shifted:
- In start
- In middle
- In end
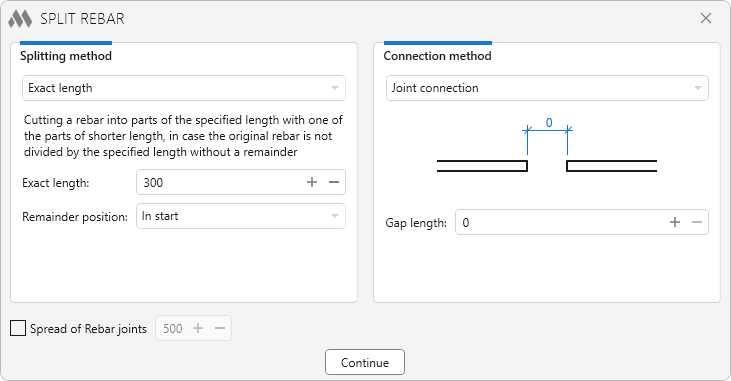

Connection method
Sets the way the rebars are connected after splitting:
- Join connection
- Overlap
- Curved bars
- Mechanical connection
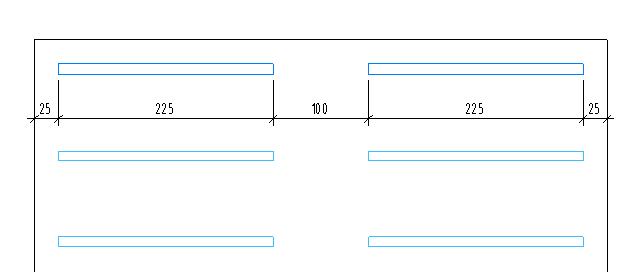
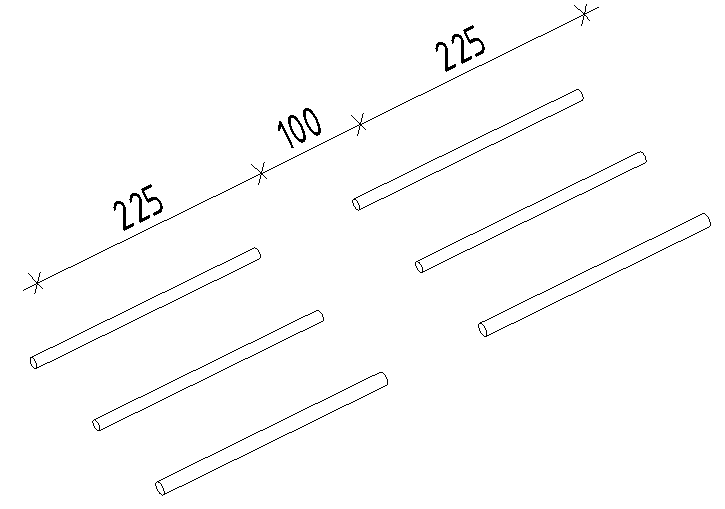
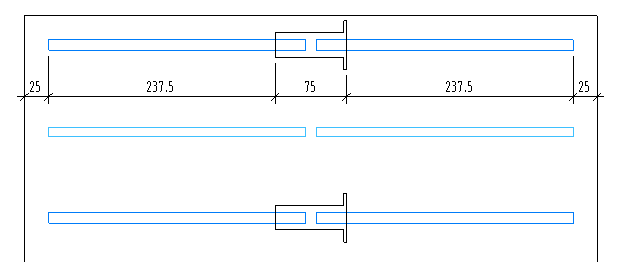
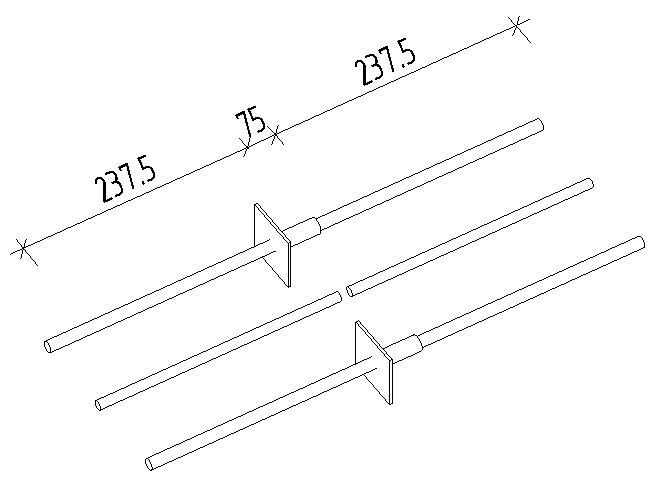
This method of connection picks up the desired length between the divided rebars in the range from 0 to 100 mm.
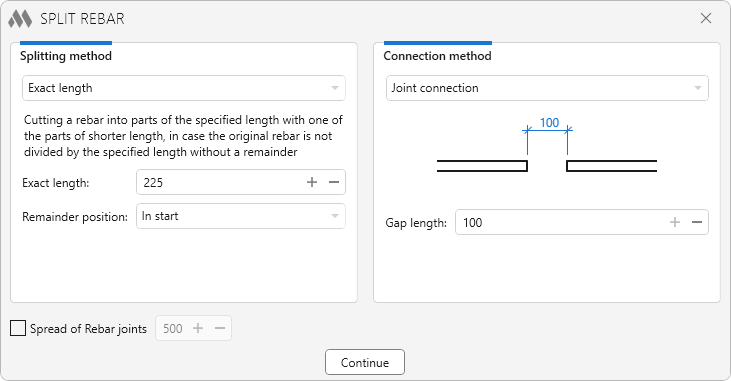
Example of a 550 mm long rebar with an exact length after separation of 225 mm and a gap of 100 mm, which is set in the parameter Gap length.
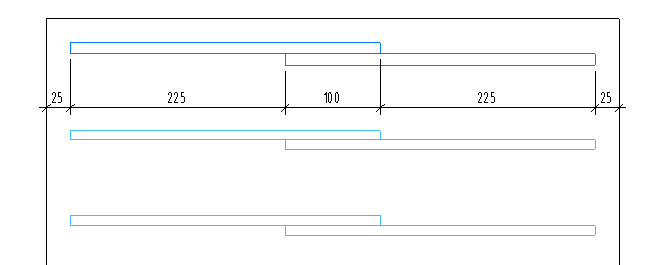
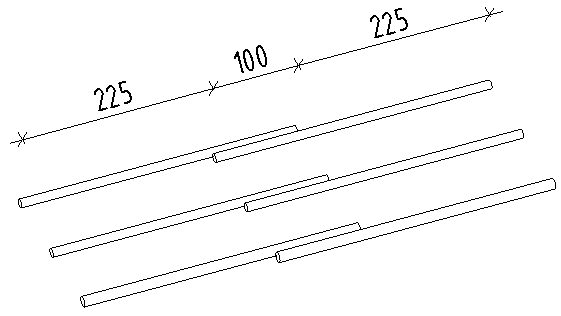
Sets the method of overlap connection of rebars with the selected length and offset of bars along the laying direction, or perpendicular to the laying direction.

Using the Curved rods method, it is possible to form a bar connection by creating a bend with the following settings:
- Overlap length
- Bend indent
- Bend length
- Bend direction
- Rebar Shape
All sizes are set on the centerline of the bar.
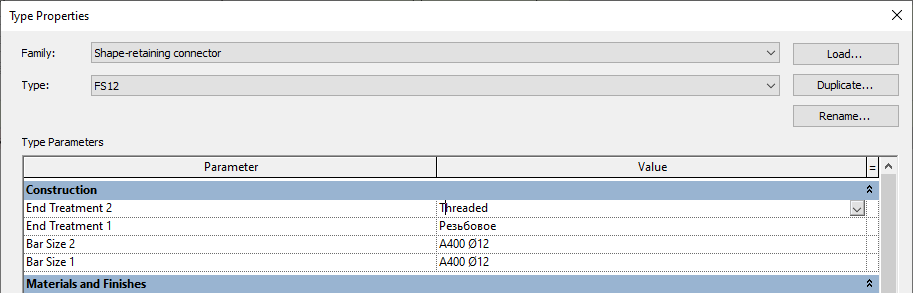
With this method rebars can be connected by means of couplers. It is important to note that the couplers is only placed if the diameter of the rebar and the connector are the same.
The values of the shared parameters from rebar to Structural Rebar Coupler can be copied by enabling the corresponding option.
For the example, 2 rebars with a diameter of 12 mm and one rebar with a diameter of 16 mm are selected. In the connection settings a coupler for 12 mm diameter rebars is selected.
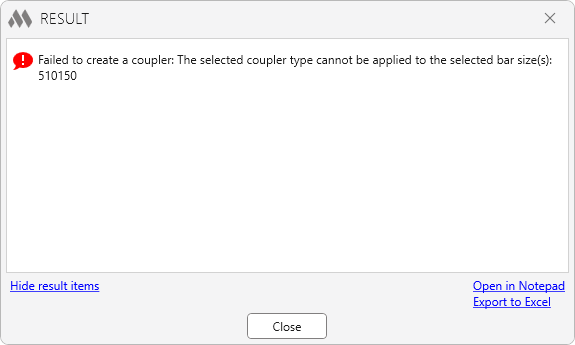
The plugin generates an error because the coupler and the rebar have different diameters. Therefore, it is necessary to choose couplers with the same diameter as the rebars to be processed.
Only those couplers that have the same reinforcement type with the same diameters selected in Bar Size 1 and Bar Size 2 are included in the selection list of the reinforcement coupler.