Editing the view templates of the model and transferring settings between them
Icon
Related news and articles
Using
The plugin is designed for viewing and modifying view template settings, as well as copying settings between view templates.
After launching the plugin, the following window opens:
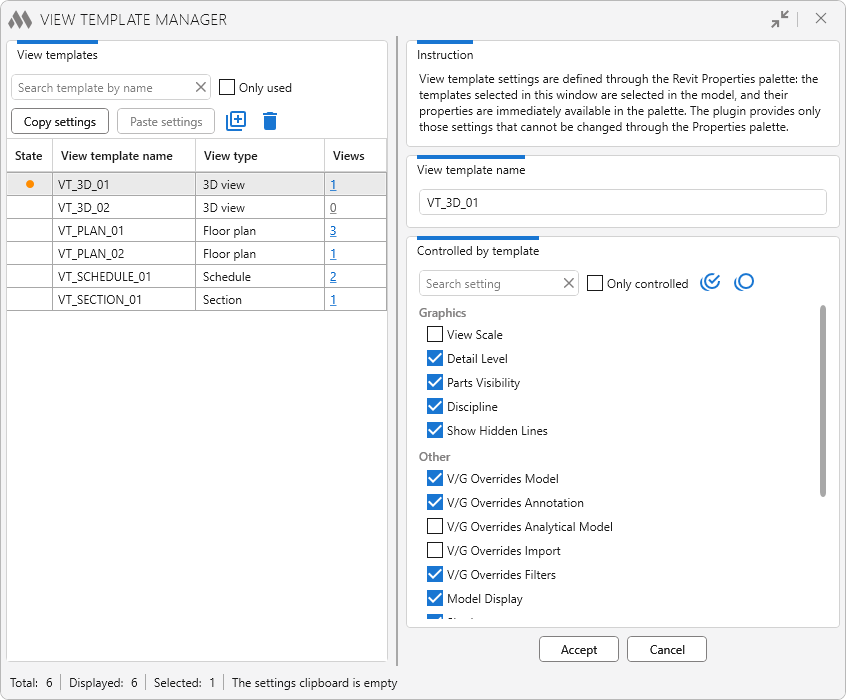
The left side of the window contains a list of view templates in the current project.
Search template by name – allows you to filter the list of templates by name.
Only used – displays only view templates assigned to at least one project view.
Copy settings – copies the settings of the selected view template to the plugin clipboard.
Paste settings – allows you to transfer the copied settings to one or more selected view templates. The button is available if the plugin clipboard contains copied settings.
The buttons on the right allow you to duplicate  or delete
  the selected view templates.
The table displays:
- State – the status of the view template. An orange dot means that changes have been made to the template settings but have not yet been applied
- View template name – the name of the view template
- View type – the view type for which the template is intended
- Views – the number of project views to which this template is assigned. Clicking the value allows you to select these views in the model.
The status bar at the bottom of the window displays the total number of view templates, the number of displayed and selected templates, as well as the contents of the settings clipboard.
When one view template is selected, its properties can be modified through the Revit Properties palette: the template selected in the plugin window is selected in the model, and its properties become available in the palette. The right side of the plugin window displays only the settings that cannot be modified through the Properties palette.
View template name – allows you to change the name of the selected view template.
The view template settings are displayed below, grouped into sections. A checked box means that the corresponding setting is controlled by the view template.
Search setting – allows you to filter the list of settings by name.
Only controlled – displays only settings that are controlled by the view template.
The buttons to the right of the search field allow you to check or clear the checkboxes for all displayed settings.
After changing settings, an orange dot appears next to the corresponding template in the State column. It means that the changes have not yet been applied.
Accept – applies the changes.
Cancel – cancels changes that have been made but not yet applied.
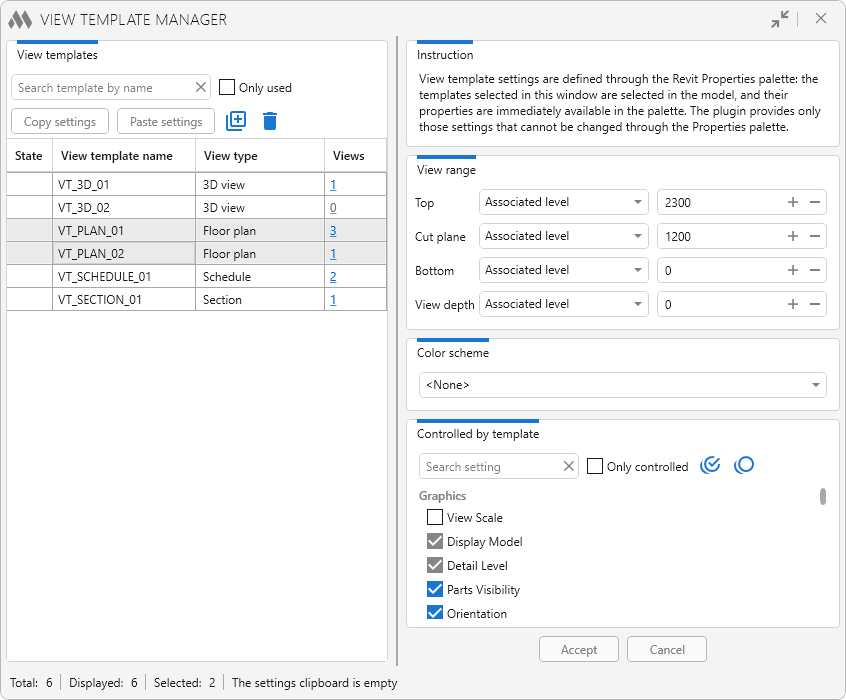
When multiple view templates are selected, the right side of the window displays their settings available for simultaneous editing. The following indication is used for the setting states:
- blue checkmark – the setting is enabled in all selected templates
- empty checkbox – the setting is disabled in all selected templates
- gray checkmark – the setting is enabled only in some of the selected templates.
Changing the state of a checkbox applies to all selected templates.
In addition, some template properties that become unavailable in the Revit Properties palette when multiple templates are selected are also displayed in the plugin window. The set of available properties depends on the types of the selected templates. If the property values differ between the selected templates, *VARIES* is displayed instead of the current value. When a new value is specified, it is applied to all selected templates.
To transfer settings between templates, select the source view template and click Copy Settings. Then select one or more target templates and click Paste Settings.
When pasting settings, the following window opens:
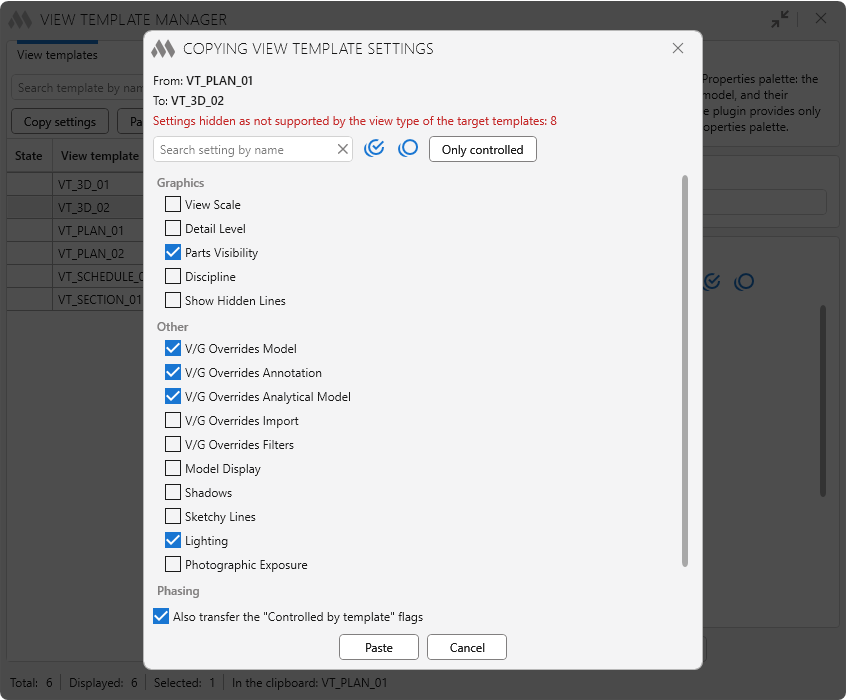
The source and target view templates are displayed at the top of the window. If some settings of the source template are not supported by the view type of the target template, their number is displayed in a separate message.
Search setting by name – allows you to filter the list of settings by name.
Only controlled – displays only settings that are controlled by the source template.
The buttons to the right of the search field allow you to select or clear the selection of all displayed settings.
In the list, select the settings that need to be transferred to the target view template.
Also transfer the "Controlled by template" flags – transfers the Controlled by template state together with the values of the selected settings.
Paste – transfers the selected settings to the target template.
Cancel – closes the window without transferring settings.


