Icon
Related news and articles
Using
The context filter can operate in two modes: the context filter and its window mode.
To launch the context filter, use the "Context Filter" command in the ribbon on the ModPlus tab:
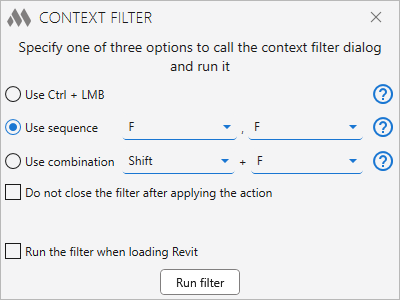
Specify one of three options for calling the context filter dialog:
- By left-clicking the mouse while holding down the Ctrl key. In this case, there may be some restrictions on working in Revit associated with the use of this combination of buttons. For example, when you try to add other elements to the set of selected items.
- By successive pressing of the indicated keys. The default sequence is "F, F". The time interval between keystrokes is not taken into account. When specifying a sequence, consider the assigned Revit hotkeys.
- By pressing the specified key combination. The default key combination is "Shift + F". When specifying a different combination, consider existing combinations (Ctrl + C, Ctrl + V and others)
You can use the same method to close the filter window as you did when calling it.
An option is available below that allows you not to close the filter after applying an action.
You can enable automatic launch of the context filter when loading Revit by checking the corresponding checkbox.
The filter only starts if the current Revit window is active!
To launch the window mode of the context filter, select the "Filter. Window mode" command in the ribbon on the ModPlus tab.
The main dialog of the context filter in both modes is divided into three zones:
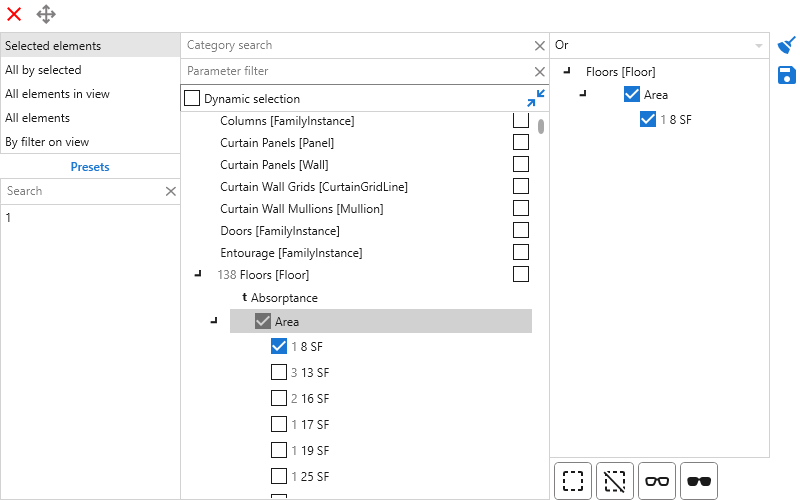
From left to right:
- The first zone contains a list of context for data collection and a list of presets (described later).
- The second zone contains a list of parameter values for elements grouped by categories of elements in the current context.
- The third zone contains a list of marked parameter values (filter list), list controls, and filter application elements.
.png)
– closes the context filter dialog.
.png)
– allows you to drag the filter around the screen.
The context for data collection may be: all model elements, all elements in view, selected elements, filters of the current document. If no elements were selected at the start of the filter, then the context Selected elements does not appear in the list. If there are no elements in the current view when starting the filter, then the context All elements in view does not appear in the list.
The context All by selected works as follows. If the filter was run when there are selected elements, the tree will display the categories of the selected elements, but all elements in the model will be processed.
When you switch to the context By filter on view, a drop-down list with all filters of the current document becomes available:
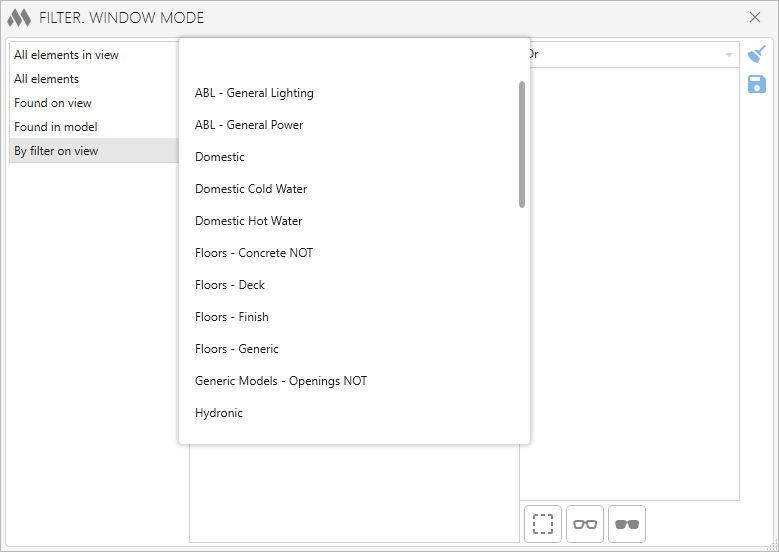
Selecting a filter on the current view will search for items by this filter, and the category tree will be filled with search results.
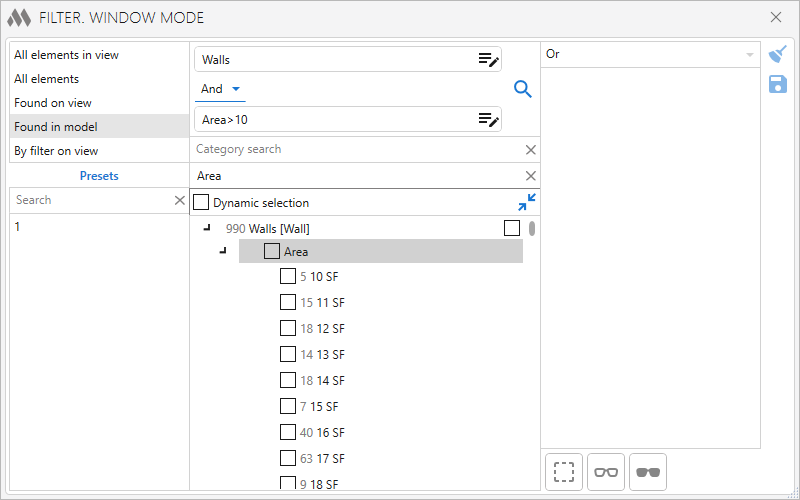
Only in window mode the contexts Found on view and Found in model are available, which process the items found using Elements filter:
The list in the second zone is initially filled only with categories of elements for the selected context. In this regard, the search in the upper zone of the list only works for categories.
Parameter filter – only parameters whose name contains the value specified in the filter will be displayed in the tree:
When the option Dynamic selection is checked and the positions in the tree are selected, the corresponding elements in the model will be selected. If a category is selected, then all elements of the category will be selected, if a parameter value is selected, then all elements with this value. Added an increased indentation to the tree elements to the left of the checkboxes - an indentation has been added for the ability to select a position in the tree, since when you click on the checkbox with the mouse, the position itself is not selected.
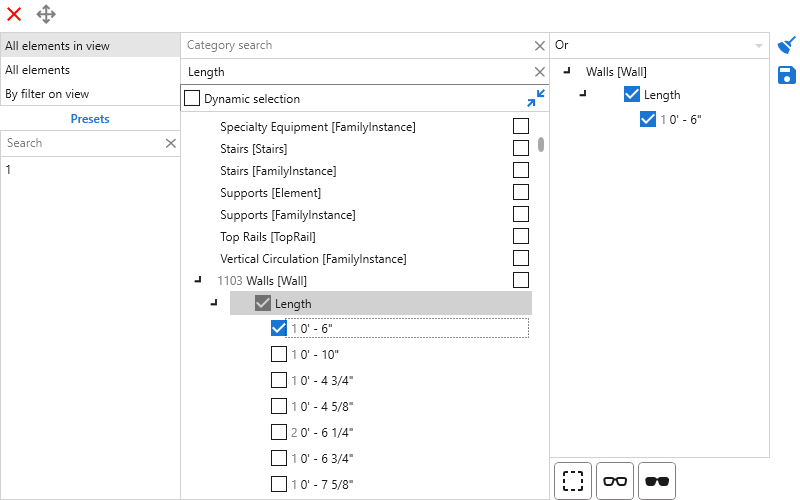
When you select a category from the list, the parameters of all elements of this category are collected. In this case, the total number of elements in this category appears in front of the category name. Type parameters in the list are displayed with a "t", shared parameters are displayed with an "s".
By clicking on a parameter, all values of this parameter are collected. The number to the left of the parameter value indicates how many elements with that value were found.
When you check the parameter value, this parameter is added to the list in the third zone. Checking the box adds all parameter values to the list in the third zone.
All values in the second list are filled in alphabetical order.
Pressing  allows you to collapse all collapsed categories in the tree.
If the filter window is open after you finish your search, the category lists will dynamically update when you switch between views or documents, or when you change the selection of elements.
In the category tree, a checkbox is available to the right of each category. If you check this checkbox for more than one category, the Same parameters zone will appear at the bottom:
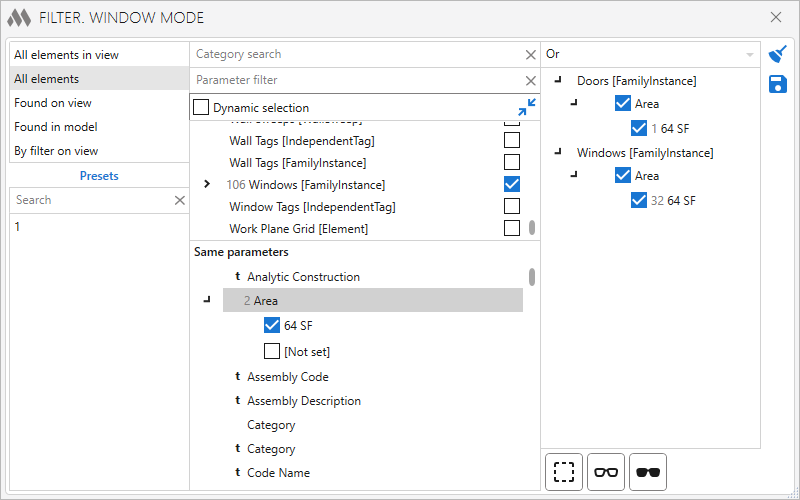
In this zone a list of parameters that occur in all selected categories is available. For each such parameter there will be available the values, which are also available for all selected categories. If you click on a parameter name, the number of the same parameter values for the selected categories will be displayed in front of the name. In this way you can search for elements of different categories with the same value of the same parameter.
All values in the list in the third zone are the result of filtering if the filter condition OR is selected at the top of the list. For example, in the screenshot above, all rebars in the current view for which the Length parameter value is 0' - 6" fall into the filtering.
If the AND filtering condition is selected at the top of the list in the third zone, then the filtering result for each category will be elements that have all the values of all parameters in the list.
You can apply one of the following actions to the list in the third zone:

– select all elements.

– remove all checked elements from the current selection. This action is available only if the elements were selected at the start of the filter.

– isolate all elements in the current view.

– isolate all elements in the current form, except for filtered ones (inversion isolation).
The following controls are available to the right of the third list:

– clear the entire current list for filtering.

– save the current filter list as a new preset or change the current preset. When you click on the button, a dialog appears:
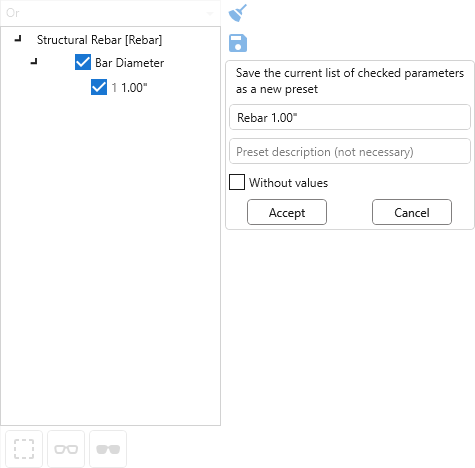
The dialog contains two fields - the name of the preset (required) and the description of the preset (optional). If the current filter list is obtained by applying a previously saved preset, then in this dialog the name and description of the applied preset will be filled in and the Save as new checkbox will appear. If the Without values option is enabled, only the categories and parameter names will be saved in the preset for later selection of all parameter values.
When saving a preset in the first zone, a list of presets appears:
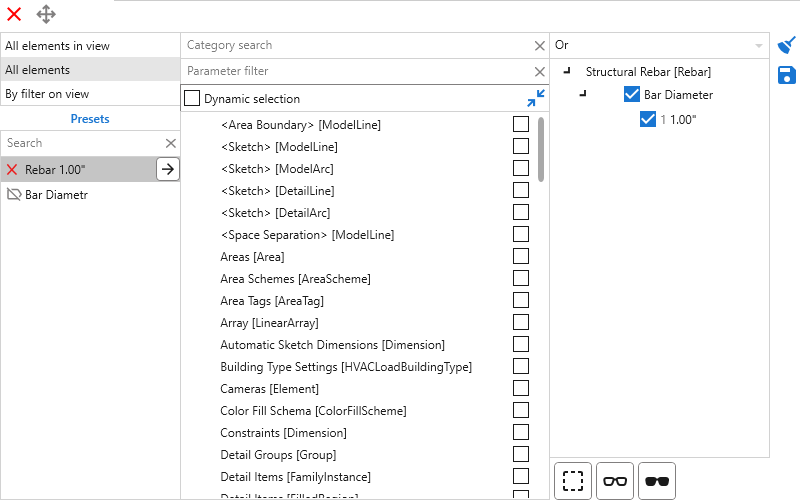
Presets allow you to save filtering conditions for their subsequent quick re-use.
The name and description of the preset are displayed in a tooltip when you hover over the preset in the list.  appears before the name of a preset saved with the Without values option enabled.
The list of presets can be saved on the ModPlus server through the Backup Settings section in the Personal Account.


